Blog

Cottage Food Laws in Arkansas | 2021 Edition

In a previous post, I gave a general overview of Arkansas’ Cottage Food law, including all the amendments we had seen up to that time in 2020.

As a reminder, when we talk about “Cottage Foods,” what we’re talking about are food items produced in a person’s home”  Or, more accurately, food items produced in a person’s home for the purpose of selling.

I explained how Arkansas’ Cottage Food law backstory perhaps first begins with the state’s landmark “Food, Drug and Cosmetic Act” of 1953, where, for the first time, the Health Department was granted authority to license and inspect all food establishments.  That presumably included home-based food establishments.

It wasn’t until 2011 that Arkansas passed its initial Cottage Food law exempting home-based producers from permit requirements.  In was a major loosening of a lot of the red tape placed on an entrepreneur’s home kitchen, though not a total removal of the red tape.  Essentially, the law maintained strict guidelines on the list of allowed items, the labeling of those items, and the locations those items are allowed to be sold at.

Later in 2017, the law was eventually amended to add chocolate-covered fruit and berries to the list of allowed items, as well as online farmers markets to the list of allowed locations to sell at.  It was amended again in 2019 to add “pop-up shops” to that list of allowed locations.

Then in 2020, though we didn’t see any new amendments to the law, we did see an interesting development with the rise of COVID-19 during a time of state-mandated social distancing.  That was a more flexible tone and a universal expectation for businesses to get creative in how their products exchange hands so as to not perpetuate the declared public health crisis.

I promised I would put out an update if there were any more changes to the law, and, sure enough, during the 2021 legislative session, Act 306 was passed, perhaps as a more formal solution for Cottage Food sellers in the wake of COVID-19.  The act included an “emergency clause” allowing the amendment to go into immediate effect upon its passage “for the preservation of the public peace, health, and safety.”  I take that to be a response to the difficult position home producers have been put it when factoring both (1) the strict requirements they’re already subject to, plus (2) whatever public health expectations are added on top of that.

The 2021 amendment finally added "the internet" to the list of allowed locations cottage foods can be sold.  Whereas online sales were earlier opened to farmers markets back in 2017, home businesses operating on their own were still limited to a short list of direct, in-person locations.  Now, online sales are open to everyone.  The exact wording of the new amendment specifies a cottage food production operation may offer it’s products directly to the consumer now:

“Through the internet if the sale from the cottage food production operation is directly to an end consumer located in: (A)  This state; or (B)  Another state if the cottage food production operation complies with all federal regulations regarding food safety.”

If I can just say, that’s great news!  If you remember, it’s something I even had on my wish list in my 2020 post.  The way I see it, this amendment is long overdue, not just because the public health crisis of 2020, but because of the rise of the digital age, oh, several decades ago!  In many ways, cottage food sellers have been required to keep their businesses stuck in 20th century times, while everyone else has been given a 21-year head start to claim their stakes in 21st century e-commerce world.

Granted, I still think word-of-mouth marketing and in-person interaction with a customer is always the best business plan, but there’s no question the convenience factor of online ordering is something today’s customers want, including those loyal, first-name basis customers.

To try and break down the law as it’s written and as best as I understand it—(and to plug in a disclaimer, I’m not an expert.  If you want the official word, you’ll need to make your own phone calls to Arkansas’ Department of Health)—

The law states cottage foods may now be offered to customers “through the internet if the sale…is directly to an end consumer…”

The first thing I’d point out about that wording is just how wide the door is open now to cottage food sellers online.  There isn't a crippling list of limits mentioned in connection with the phrase “internet.”  That must mean, all legitimate online platforms are open game.  Whether that’s your own website, or social media page, or some online marketplace site with a landing page dedicated to your business, etc.

The important qualifier that is mentioned is the fact your online sales must still be made “directly to an end consumer.”  Before this amendment, I would have interpreted a “direct" sale to mean an “in-person” transaction and exchange of products, especially since the list of allowed locations a individual cottage food seller could sell were all “in-person” locations.  However, because the nature of the internet isn’t in-person but digital, “direct” sales must simply mean no third-party brokers.

Therefore, whatever online platform you choose, just remember your cottage food sales need to happen directly.  Even if you’re selling through someone else’s website, the funds and products being transferred need to happen straight from the customer to a business, and a business to the customer.  It can’t be exchanged through a third party.

The law goes on to specify where a customer can be located to order your cottage foods online.  That list first includes “[The state of Arkansas].”No qualifiers are placed on that.  Any online order placed in the state is allowed.

The list also includes “[Any other state] if in [compliance] with all federal regulations regarding food safety.”  That opens the door to out-of-state orders, though the obvious qualifier is if you’re in compliance with federal rules.

Ordinarily, every individual state governs it’s own cottage food laws.  However, once you cross the state line, your online orders enter federal jurisdiction and are subject to federal rules.

How do you know if you’re in compliance with federal rules?  For those answers you would need to check with the United States Food and Drug Administration (or “FDA”).  Specifically, you might check the FDA’s “Food Code,” most recently updated in 2017 at the time I’m recording this.  Just keep in mind, because cottage food requirements are generally left to individual states to determine, you’re not going to find explicit federal provisions addressing cottage foods, at least, not to my knowledge.

I did notice that the Food Code excludes private home kitchens from its list of “Food Establishments” subject to licenses, training, permits, and inspection.  However, when talking about private home kitchens, the Food Code only refers to them in relation to their use of in-person sales, such as at a church bake sale.  So, there’s no clear category for a cottage food operation that engages in internet sales, let alone internet sales across state lines, or what is referred to as “interstate commerce.”  You can do your own reading to see if you find anything different.

If you don’t find what you’re looking for in the FDA’s Food Code, you can try looking into “Title 21 on Food and Drugs” in the Code of Federal Regulations (or “CFR”).  I’ll just admit to you, when it comes to federal rules, I’m not going to be much good in helping you narrow down your research to find the most relevant factors to consider.  Perhaps someone reading this who has more experience than me can comment on what we need to know.

The only other thing I would mention when talking about internet sales, whether that’s within your state or across state lines, is the implication that (#1) payments are being transferred electronically, and (#2) goods are being transferred physically.

In terms of receiving payments, most e-commerce platforms are going to use some kind of online “payment gateway.”  That could be Paypal, Stripe, Square, Braintree, or some other Credit Card  payment solution.  Just remember, when processing cards online, there usually is a transaction fee to go along with it.  You’re paying for the service and the convenience of receiving payments online.  It’s all making things easier for your customers—and, in many ways, it can make things a lot easier for your small business too.

In terms of getting the goods into your customers hands, there are also different options to choose from.  If we’re talking about online sales made to customers within Arkansas, I think it’s understood your options would be three-fold—those being, “pickup,” “delivery,” or “shipping.”  Again, I’m making some assumptions here based on how internet sales are usually handled.

I imagine reasonable pickup locations would include that short-list of allowed locations already outlined in the law, namely (1) your home, (2) a farmer’s market, (3) a county fair, (4) a special event, or (5) a pop-up shop.  I talk about those in my other post.  It makes sense to me, if you’re already set up in those spots for in-persons sales why you can’t turn those spots into a pickup location if an order comes in online.

I believe delivery is another reasonable way to fulfill online orders, whether that’s “at-home delivery,” or delivery at established “points-of-distribution” such as a commuter lot or a church parking lot.  I don’t see why that wouldn’t be allowed under an internet sale approach.

Shipping is probably the most obvious way online orders are fulfilled, especially for out-of-town and out-of-state customers.  Since you’re shipping food, you’ll just need to check on what your mail services’ packaging requirements are for sending food through the mail.  I know the  United States Postal Service has a page on its website with a section all about food shipments.

I think the important rule-of-thumb to comply with in a shipping company’s rules, your state’s cottage food laws, or any federal rules (if you’re shipping across state lines) is the avoidance of your items being deemed hazardous.  That’s something you should think about before your cottage foods leave your door, but it’s also something you need to think about while your cottage foods are in transit.   Ask yourself the question, in whatever packaging or shipping methods you use, will your items remain safe for the customer?  That's the important question.

To wrap this up, I think the 2021 amendment is a wonderful addition to the law.  Amy and I have already started making updates to our website to allow for online payments on our cottage food items.  If you want to see how we do it, you can visit us at www.thekinnardhomestead.com/products.

When to Start your Garden Factoring the Last Frost Date

"To plant, or not to plant?"

That is the question on a lot of gardener's minds every spring as temperatures warm up and as their "gardening bug" starts to itch.  It's that time now here in Arkansas as I write this post.  Amy and I already have a window full of tomato plant seedlings which we started indoors earlier in the year.  They've grown to the needed size and are about ready to be moved outside.

When talking about early spring and transplanting your seedlings into the ground, or sowing and planting what you picked up at the plant nursery directly into the ground, an important question to always ask is, "When do you get started?"

The biggest determining factor a gardener must think about when deciding on the right time to start their outdoor garden—assuming we’re talking about a warm-weather garden—is the last frost date.

Of course, there are many hardy, cold-weather plants that actually enjoy the cold that you would want to put in the ground before the last frost date.  If we’re talking vegetable gardening, examples of cold-hardy plants would include:

  • Beets
  • Cabbage
  • Carrots
  • Lettuce
  • Parsnips
  • Peas
  • Radishes
  • Spinach
  • Turnips

There are others in addition to those—you can always look up a complete list online.  Just keep in mind, though these particular plants enjoy cooler weather, some are less hardy than others and may still need some ground cover protection on really cold days.  Many of these plants do well not only in the early spring, but, when cooler temps return after the hot summer months, they do quite well in your fall garden too.

In terms of warm-weather gardening, the kinds of plants you’d want to grow include:

  • Beans
  • Corn
  • Cucumbers
  • Okra
  • Peppers
  • Squash
  • Tomatoes
  • Zucchini
  • And So forth…

Again, you can look up a complete list online. As the name implies, though, warm-weather plants prefer warm weather.  Therefore, you don’t want to get started on them while cold weather is still around, especially not cold weather that can drop below 32 degrees Fahrenheit.

When I say “you don’t want to get started on them,” I just mean you don’t want to expose them yet to any cold ground or air temperatures.  Other than those plants that do best being sown directly into the ground, you can always start your transplantable seeds indoors.  Depending on the germination and maturity times common for a plant—most seed packets will list those timeframes on their labels—you can start your warm-weather plants the appropriate number of weeks before the last frost date indoors.  Just place them in a window or under a grow light.  Some like to use a heating mat to give them a little extra boost.

Even so, the question still remains, “When do you get started outside?"  The answer to that is “After the last frost date.”  Of course, that answer raises it’s own question—“When is the last frost date?”

You may have heard a few “old wives’ tales” from one of the old-timers in your family that you’ve learned to rely on.  That could be the 6-week countdown after February 2 if the groundhog sees his shadow.  That would put winter’s end March 16.  Or, there’s the adage, “Thunder in February means frost in May on the same day.” (I’ve heard that one applied to April as well).  Or, “Fog in February means frosts in May.”  Or, “The threat of frost exists until the first full moon of June”

There’s also the old Czech legend of the “Three Frozen Kings.”  According to the story, there were three Czech kings who each went fishing out on the sea.  One went out on May 12th and froze when temperatures suddenly dropped.  The second King went out the next day on May 13, but he also froze with a sudden drop in temperature.  The day after that, on May 14th, the third King went out to fish, and like the two kings before him, he froze too.  However, on May 15th, a saint named Zofie came along with a kettle of hot water.  He found the three frozen kings adrift, and proceeded to thaw them each out.  I suppose the moral of the legend is not to braze the freezing temps before May 15th.

Others like to use easy-to-remember holidays or other familiar dates to go off of, whether that’s Good Friday, Easter, Tax Day, or Memorial Day.  You may have your own trusty date you like to use, and you’re certainly welcome to it.  Amy and I like to use Tax Day on April 15th as a good window to start planting for us.

The fact of the matter is that the last frost date is never the same every year.  The best estimation a person can make will be based on the historical averages for their particular area.  For a range of general dates, you can always look up a map of last frost dates based on your “Plant Hardiness Zone” put out by the USDA.  According to the map, if you’re in Zones 3 or 4, your last frost date may range anytime throughout the month of May.  If you’re in Zones 5 through 7, the range bumps up to April.  If you’re Zone 8, it may be late February to late March.  If you’re in Zones 9 or 10, you’re good to go as early as January or February.

Just check your location.   If you don’t use the USDA Hardiness Zone map, the “National Oceanic and Atmospheric Administration” (“NOAA”) has similar maps you can use.

If you want to narrow your estimation down to a single date on the calendar, you can always look up the historical data for your specific state or zip code.  Instead of being given an average date range, you’ll be given a single average date.

Just keep in mind how averages work.  Averages are calculated by dividing the sum of both early and late dates.  Therefore, there’s a 50% chance your last frost date will occur before or after the average date listed.  All that to say, if you’re going to pick a time to plant, you might pick a time a couple weeks after the average last frost date for your area.

Well, hopefully that points you in the right direction to determine when to start your own warm-weather garden.  We’re a few days away from getting started on ours.

Scouting and the Search for Biblical Masculinity

Back in 1908, there was a British cavalry officer by the name of Lieutenant General Robert Baden-Powell who had an idea.  Actually, the idea was born a few years earlier during Powell's service during the Second Boer War in South Africa where he wrote in 1899 a very non-conventional field manual for British Soldiers called "Aids to Scouting" which was filled with inspiring stories, general scouting methods, and even games meant to encourage the development of light reconnaissance skills within the British Army. As a piece of trivia, during his military campaigns in South Africa, Powell had to get creative at a time when his troops were seriously outnumbered.  At one point, calling on the help of 12-to-15 year old boys apart of a volunteer group of young men in training known as the Mafeking Cadet Corp.  These were cadets dressed in khaki uniforms and wide-brimmed hats and were deployed to support troops by delivering messages or supplies, helping in the hospitals, etc.  This freed the actual soldiers to focus on combat.  Powell's scouting book was produced out of his experiences working with the boys of the Mafeking Cadet Corp. The book became a popular field manual not only for the British Army.  It soon caught the attention of young boys in general throughout Britain.  In response to this, Powell wrote a nonmilitary edition with added lessons on good morals and citizenship, in addition to those common scouting skills the military cadets learned.  To test out his new field curriculum, on July 25, 1907, he and a few other instructors took a group of 22 boys on a camping expedition to Brownsea Island in Dorsetshire off the coast of England.  There they spent a fortnight (2 weeks), teaching the boys about camping, observation, deduction, woodcraft, boating, lifesaving, patriotism, and chivalry.  By all accounts, this was the first Boy Scout meeting to be held. The following year, in January 1908, Powell's new field guide was published under the name "Scouting for Boys" and troops began springing up all across the British Commonwealth.  A central Boy Scout Office was set up to register the new scouts, to organize it's leadership, to design a uniform, and so forth.  By the end of the same year, there were 60,000 eager boy scouts ready for adventure, which each troop soon undertook with it's own expeditions.
In 1909, the first national Boy Scout meeting was held in London which 10,000 scouts attended, including a group of uniformed girls who called themselves the "Girl Scouts."  Apparently, they wanted to be apart of the action too.  For reasons we'll come back to, Powell decided to keep the new organization exclusive to boys, though he also agreed to launch a separate program dedicated to the girls which received the name the "Girl Guides."  So, dating back to it's original founding, there has been some shared interest in scouting between boys and girls, as well as some discussion on whether to combine or keep to separate the two groups.  Again, I want to come back to this in a bit. Around the same time, an American version of the Boy Scouts came to be, when a Chicago publisher by the name of William Boyce was one time lost in the fog and helped by a unknown scout who helped get him through it.  Boyce was so inspired by the experience, he launched several outdoor youth organizations which developed into the Boy Scouts of America ("BSA").  Popularly of the movement spread in America just as it had in Britain, including among the girls.   So, in 1912, the Girl Scouts of America was also established. There are so many principles we could point to that makes scouting "scouting," especially as it was first presented by Mr. Baden-Powell.  There's a lot of good stuff to think about.  But, one aspect in particular I think is worth mentioning, especially for our modern times, is the emphasis the program was originally designed to give to the training of boys in their transition to becoming men.  For example, in the Preface to the first edition of the Boys Scouts of America Handbook in 1911, the editorial board explains:
"The BOY SCOUTS OF AMERICA is a corporation formed by a group of men who are anxious that the boys of America should come under the influence of [the] movement and be built up in all that goes to make character and good citizenship…      In these pages and throughout our organization we have made it obligatory upon our scouts that they cultivate courage, loyalty, patriotism, brotherliness, self-control, courtesy, kindness to animals, usefulness, cheerfulness, cleanliness, thrift, purity and honor.      No one can doubt that with such training added to his native gifts, the American boy will in the near future, as a man, be an efficient leader in the paths of civilization and peace….      We send out our 'Official Handbook,' therefore, with the earnest wish that many boys may find in it new methods for the proper use of their leisure time and fresh inspiration in their efforts to make their hours of recreation contribute to strong, noble manhood in the days to come."
Or, as it's explained in Baden's Powell's original manual,
"The object of [it's] institution is to complete the sequence of the training from boyhood to manhood, through the progressive grades of Wolf Cub, Scout, and Rover (which, apparently, were the original scouting ranks)"
No wonder the decision was originally made to keep the Boy Scouts and Girl Scouts as separate organizations.  Foundationally, the Boy Scouts were built with the objective of training boys to be men.   That, obviously looks different than the objective of training girls to be women.  At least, it used to be obvious.   How did the manual say it, "No one can doubt that with such gifts the American boy will in the near future, as a man, be an efficient leader." Unfortunately, though that leadership training and gifting traditionally associated with manhood was once something “no one can doubt,” things have changed over the last 100 years. Today, there seems to be some confusion as to the basic definition and distinction between manhood or womanhood. The biblical complementarian belief that men and women are created equal in value and worth before God, but created differently by design in their roles and responsibilities has been lost in the larger culture.  A modern feminist, egalitarian uniformity, insisting on the virtual equality of men and women (including in their roles and responsibilities), has now become mainstream.  Some even believe gender itself is a social construct that has no place in public discourse.  Other than the biological blue and pink differences between boys and girls (which themselves should be open to transitioning from one to the other if so desired), all of us are just a colorful non-binary spectrum of people.   We are what we want to be.  In my opinion it’s all the result of a increasingly secular society, that no longer answers to God or the authority of Scripture to tell us what we are, or should be. Unfortunately, the Boy Scouts program itself has since abandoned its foundational understanding of the important differences between men and women, despite their continued promise to honorably fulfill their duty before God in their Scout Oath.  In a 2017 statement by Chief Scout Executive Mike Surbauh (Sir-bah), it seems the organizations real loyalty is now to the shifting opinion of a very confused society.
“We and others have recently been challenged by a very complex topic on the issue of gender identity. For more than 100 years, BSA…ultimately deferred to information on an individual’s birth certificate to determine eligibility for, and participation in, [the program]… “After weeks of [conversation], we realized that referring to birth certificates as the reference point is no longer sufficient…Starting today, we will accept registration in our scouting programs based on the gender identity provided on an individual’s application.”
In other words, it doesn’t matter how God made you, or his intended design for the biological sexes—if you want to tag along with the guys, the door is open to you.  If you want to state on the application you are a guy, even if you’re a girl, no big deal.  Distinguishing between manhood and womanhood is no longer important to us. Regardless of the direction the BSA and the broader culture has gone, acknowledging the God-given differences between men and women is still important.  Why?  Because God’s good plan for the sexes hasn’t changed.  What is God’s good plan for the sexes?  We’re told a big part of God’s plan for the sexes to is reflect aspects of his nature and character. Genesis 1:27 says, “So God created man in his own image, in the image of God he created him; male and female he created them. I take that to mean there are certain attributes hardwired into man that makes him a man, and in a woman that makes her a woman, that, when taken complementarily, makes them in God’s image.  I won’t take time to go through all those qualities, but biblically they are there.  And, biblically they haven’t changed.  How do we know that?  Because the nature of God hasn’t changed.  “He is the same, yesterday, today, and forever” (Hebrews 13:8). Another part of God’s plan for the sexes, particularly in the context of marriage, is to reflect not only aspects of God’s nature and character but of the complementing nature of the Gospel itself.  Ephesians 5:31, “Therefore a man shall leave his father and mother and hold fast to his wife, and the two shall become one flesh.’ This mystery is profound, and I am saying that it refers to Christ and the church.” Before that the text speaks of a man and woman’s different but complementary roles in the home. A man’s primary leadership in the home, and a wife’s instrumental support of her husband, creates a kind of living portrait of how God graciously leads the church, and how the church joyously thrives as an integral part of God’s work in the world. Obviously, the home is where biblical masculinity and biblical femininity are meant to shine brightest.  But, certainly, it can still be reflected in public life too, whether that’s in the church, or at the sports arena, or even on scouting trail. The BSA may have lost its way in the search of what it means to be a man, but that doesn’t mean everyone on the trail has.  In fact, if you’re looking for a Christian scouting organization that still holds to a complementarian view, and which came about as a result of the BSA’s wrongly calibrating their compass on such matters, I can point you to Trail Life USA. According to it’s website,
“Trail Life USA is a Church-Based, Christ-Centered, Boy-Focused mentoring and discipleship journey that speaks to the heart of a boy. Established on timeless values derived from the Bible and set in the context of outdoor adventure, boys from Kindergarten through 12th grade are engaged in a Troop setting by male mentors where they are challenged to grow in character, understand their purpose, serve their community, and develop practical leadership skills to carry out the mission for which they were created.”
I’ve got two of my boys in a local Trail Life Troop here in Arkansas.  Actually, three of my boys are currently participating—one, due to his special needs, is participating in more of an honorary capacity right now, though I was excited to learn Trail Life does have a special track for Special Needs students.  I’ll probably be looking into that eventually.  Soon, though, I’ll have my fourth son enrolled when he turns 5.  As one of the dads, I’m also actively involved.  So, it’s turned into something for all the guys in our family. I like what I read in an article at Backpacker.com, reporting on Trail Life’s inception.  One member of the organization was quoted saying, “The Boy Scout may own the trademark of ‘scouting,’ but they don’t own the idea.”  The article goes on, “Here, ‘Trailmen’ replace ‘Boy Scouts;’ instead of a second-grader earning the Wolf badge…he’s a Hawk in Trail Life. The oaths have strong overlap…as do many of the skills, including a focus on survival, first aid, and being a good citizen…‘At our core’ [Trail Life CEO, Mark Hancock explains], ‘we are unapologetically Christian…It is absolutely in our foundation—irretrievable, irreplaceable, irremovable.” So far, I have been more than impressed with the teaching and instruction we’ve received in Trail Life.  Not only are the outdoors skills and fraternal relationships something that I think fosters manliness, but the focus on character building and biblical truth is something that fosters godliness.  That happens to be core distinctive of Trail Life.  The program is “focused on turning boys into godly men.  Our firm conviction is that this can only be done by allowing a boy the opportunity to interact, work with, and be mentored by and with other Christian men.” I could say more about Trail Life USA, and scouting in general.  Suffice it to say, I believe a crucial part of the entire pursuit is a discovery of the person God wants you to be.  For boys, I believe that must necessarily include their becoming God honoring men, which is why we’re apart of the program we’re apart of.  To learn more, I’d point you to www.traillifeusa.com where you’ll find more information on their distinctives and values, as well as their various advancement tracks for the boy.  You can also find a directory of the different troops and what local options are close to you.[/vc_column_text][/vc_column][/vc_row]

Ham Radio and Emergency Preparedness

I can remember when I was a kid visiting my Great Uncle Joe in Greenwood, Arkansas, who had as a hobby Amateur Radio, also known as "Ham Radio."  I remember strolling past his makeshift closet-turned-radio shack next to his bedroom and hearing all the funny sounds of frequency tuning and voice modulations that sounded to me a lot like the communications I'd seen the movies with airplane pilots.  Or, since I was into Star Wars, it reminded me of  the radio chatter between the X-Wings and Y-Wings during the big Death Star battle.  Those who've seen the movie know what I'm talking about.  It was always intriguing to me.

Uncle Joe would always invite me to sit with him at his desk next to his old Kenwood HF radio (TS-440S for those enthusiasts out there).  Next to that he had his Morse Code equipment, and a map on the wall with thumbtacks identifying all the different states and countries he'd communicated with and would mail his QSL postcards to.  His callsign was “NR5H,” operator class “Amateur Extra.”  If you look up that callsign, I think it’s since been reissued to somebody else, but at the time that was my Uncle Joe.

He always had several friends he'd touch base with every night.  I'm not even sure where they were located, but I know he really enjoyed connecting with them.  Evidently it was something he'd held on to ever since his World War II days as a radio operator.  And, as a kid, it's something that captured my interest too.

Eventually, as a teenager, I decided to study to take the Technician class exam to get my own Ham Radio license.  One summer I went up to Greenwood and spent a couple of weeks with my Uncle Joe, along with my ARRL license manual, for him to tutor me and help me understand the basics.  After that, I passed my exam and got involved with the local Ham club in my hometown.  Whereas my Uncle was into the long range HF bands, all the locals (as far as I was concerned) made use of the shorter range VHF bands, with the repeater towers positioned around the state to bounce off of.

Here I was 17 or 18 years old, hanging out with a bunch of old timers and retirees who would meet up every week at the local Hardy's in Heber Springs for breakfast and coffee to talk radio.  I was by far the youngest guy in the room, but I loved it and soaked up as much as I could learn.

After High School and for the next 20 years after that, the hobby took somewhat of a backseat as I focused on other things—life and career.  But, I was sure to keep my license renewed with plans to one day get back into it.

One of the occasions I’d always pull out my radio for was severe weather.  Being in Arkansas we are in the tornado country, and one of the big benefits of ham radio is the emergency preparedness factor.  Whether that’s storm chasers reporting on real-time conditions of tornadic activity, or, in the aftermath, when phone lines and cell towers go down, it’s the Ham Radio Operators who are able to supply emergency communications to those who need it.  So, that’s one reason I keep my radio nearby.

But also for just emergency communications in general.  As you know, cell service doesn’t extend everywhere.  In fact, I recently went on a backpacking campout with two of my sons and their Trail Life scouting troop.  It was in the Ouachita National Forest, a few hours away from the church where the troop is based.  We parked our vans at the start of a trail off the highway, several miles outside the nearest town, and hiked our 3 miles to our campsite.

There was absolutely no cell service in the spot we were at, with all the high and low terrain.  Before the trip, I went ahead and programmed into my radio the frequencies for the different area repeaters as a just-in-case precaution.  As it turns out, it’s a good thing I did because we experienced our own emergency situation on the trail.

After our first night at camp, one of our boys stepped into a hole hidden beneath the leaves and twisted his leg up pretty seriously, leaving him in no condition to walk.  His troop leaders and fellow student trail men immediately jumped into action and made a stretcher out of a tarp and couple long branches.  The 3-mile hike we made the day before wasn’t level terrain by any means, and at one point required the crossing of a running stream, so they all had their work cut out for them to carry him back out.

In the meantime, while the guys started their hike back to the highway carrying the boy on the stretcher, knowing that process would itself take close to an hour, it was important we try to call for help to meet the guys as they resurfaced from the trail, but, of course, there was no cell service.  So, I pulled out my trusty ham radio, and with another fellow Ham (W4BBU) who had brought his radio, we set out to climb a nearby ridge to try and get line-of-sight signal with one the repeaters.

It took us several attempts and searching for the right spot.  But, finally finding a decent clearing and a fallen tree that we were able to climb to get the best elevation, we made contact with a ham radio operator in nearby Hot Springs Village—147.015 MHz, station W5HSV.  Shout out to K0TXT, Jim, of Hot Springs Village for answering our call for help.  He was able to call dispatch and have first responders meet our guys on the trail before they had even finishing the 3-mile hike back.  They were then able to transfer the boy in the proper vehicle and get him safely to the hospital.  The radio system worked precisely as it needed to.

Then, believe it or not, not a few hours later, another fluke accident happened with another one of the scouts.  This time, while exploring the stream, another boy lost his footing on a slick rock and fell, breaking his arm.  It was totally coincidental and a freak misstep.  Usually, our guys are quite careful and follow proper safety practices.  But, for whatever reason on this trip, we ended up with a second injury in the same day.

Once again, our leaders and trail men jumped into action.  They made a temporary splint and sling out of a few sticks, a piece of hard plastic from the frame of a pack, and some cloth material.  And it’s another hike back to the highway for yet another group, and another hike up the ridge for me and Bill, our other ham.  We make contact again with the local repeater we connected with before.  The radio operator out of Hot Springs Village this time, instead of calling dispatch, served as a third-party communicator and called our Troop Master who was still at the hospital with injured boy #1 to let him know about injured boy #2.  Transportation arrangements were then made for boy #2, and he also was safely taken to the hospital.

Folks, these kinds of things can’t be anticipated, but, with a little forethought, they can be planned for by practicing old fashioned emergency preparedness.  “Be prepared” is the old scout motto.  Actually, the motto for our Christian Trail Life troop is “Walk Worthy,” but certainly walking worthy includes walking in wisdom and good judgment.  And, part of good judgement is planning ahead and even preparing for the possibility of crisis situations.

The examples I’ve given are obviously just a few examples.  There are so many different situations in life that can result in a far better outcome than they would otherwise for those who encounter them when they aren’t totally caught off guard.  In terms of emergency communication, something as simple as a ham radio can make all the difference in coordinating the help that you need.  Of course, in a non-emergency situation, you have to be licensed to use one, but in a true emergency, you don’t need a license.  According to the FCC Rules, Title 47, Part 97, Paragraph 403—

 “No provision of these rules prevents the use by an amateur station of any means of radiocommunication at its disposal to provide essential communication needs in connection with the immediate safety of human life and immediate protection of property when normal communication systems are not available.”

So, there you have it.  Anyone can use a ham radio in an emergency.  Granted, it’s kind of important you know how to use the radio and how to actually make contact with another person.  Often, ham radios have to be programmed in order to connect with area repeaters.  So, my advice is, if you’re going to get the radio, you might as well go ahead and get the license to go with it.

Long story short, ham radio can make all the difference, whether on the trail, or for advance warning of a tornado, or in the aftermath cleanup of a tornado, or a hundred and one other applications.

That’s my plug for ham radio.  It’s a wonderful hobby, and a wonderful preparedness tool to have in your arsenal.

Healing Burns and Wounds with Guest Joy Durand

Amy:   Thank you all for joining me today as I get to introduce to you my favorite herbalist, mother of 8, small business owner, piano teacher, university flute instructor, and older sister, Joy Durand. I've been bubbling over with barely contained excitement at the opportunity to have her on our podcast so she can share with you herself the amazing journey she's been on when it comes to treating her family's health needs using all-natural treatments.  She's my go-to, what I like to call, “walking encyclopedia” when it comes to herbal remedies.

Welcome to the show, Joy!

Joy:  Thanks for having me.

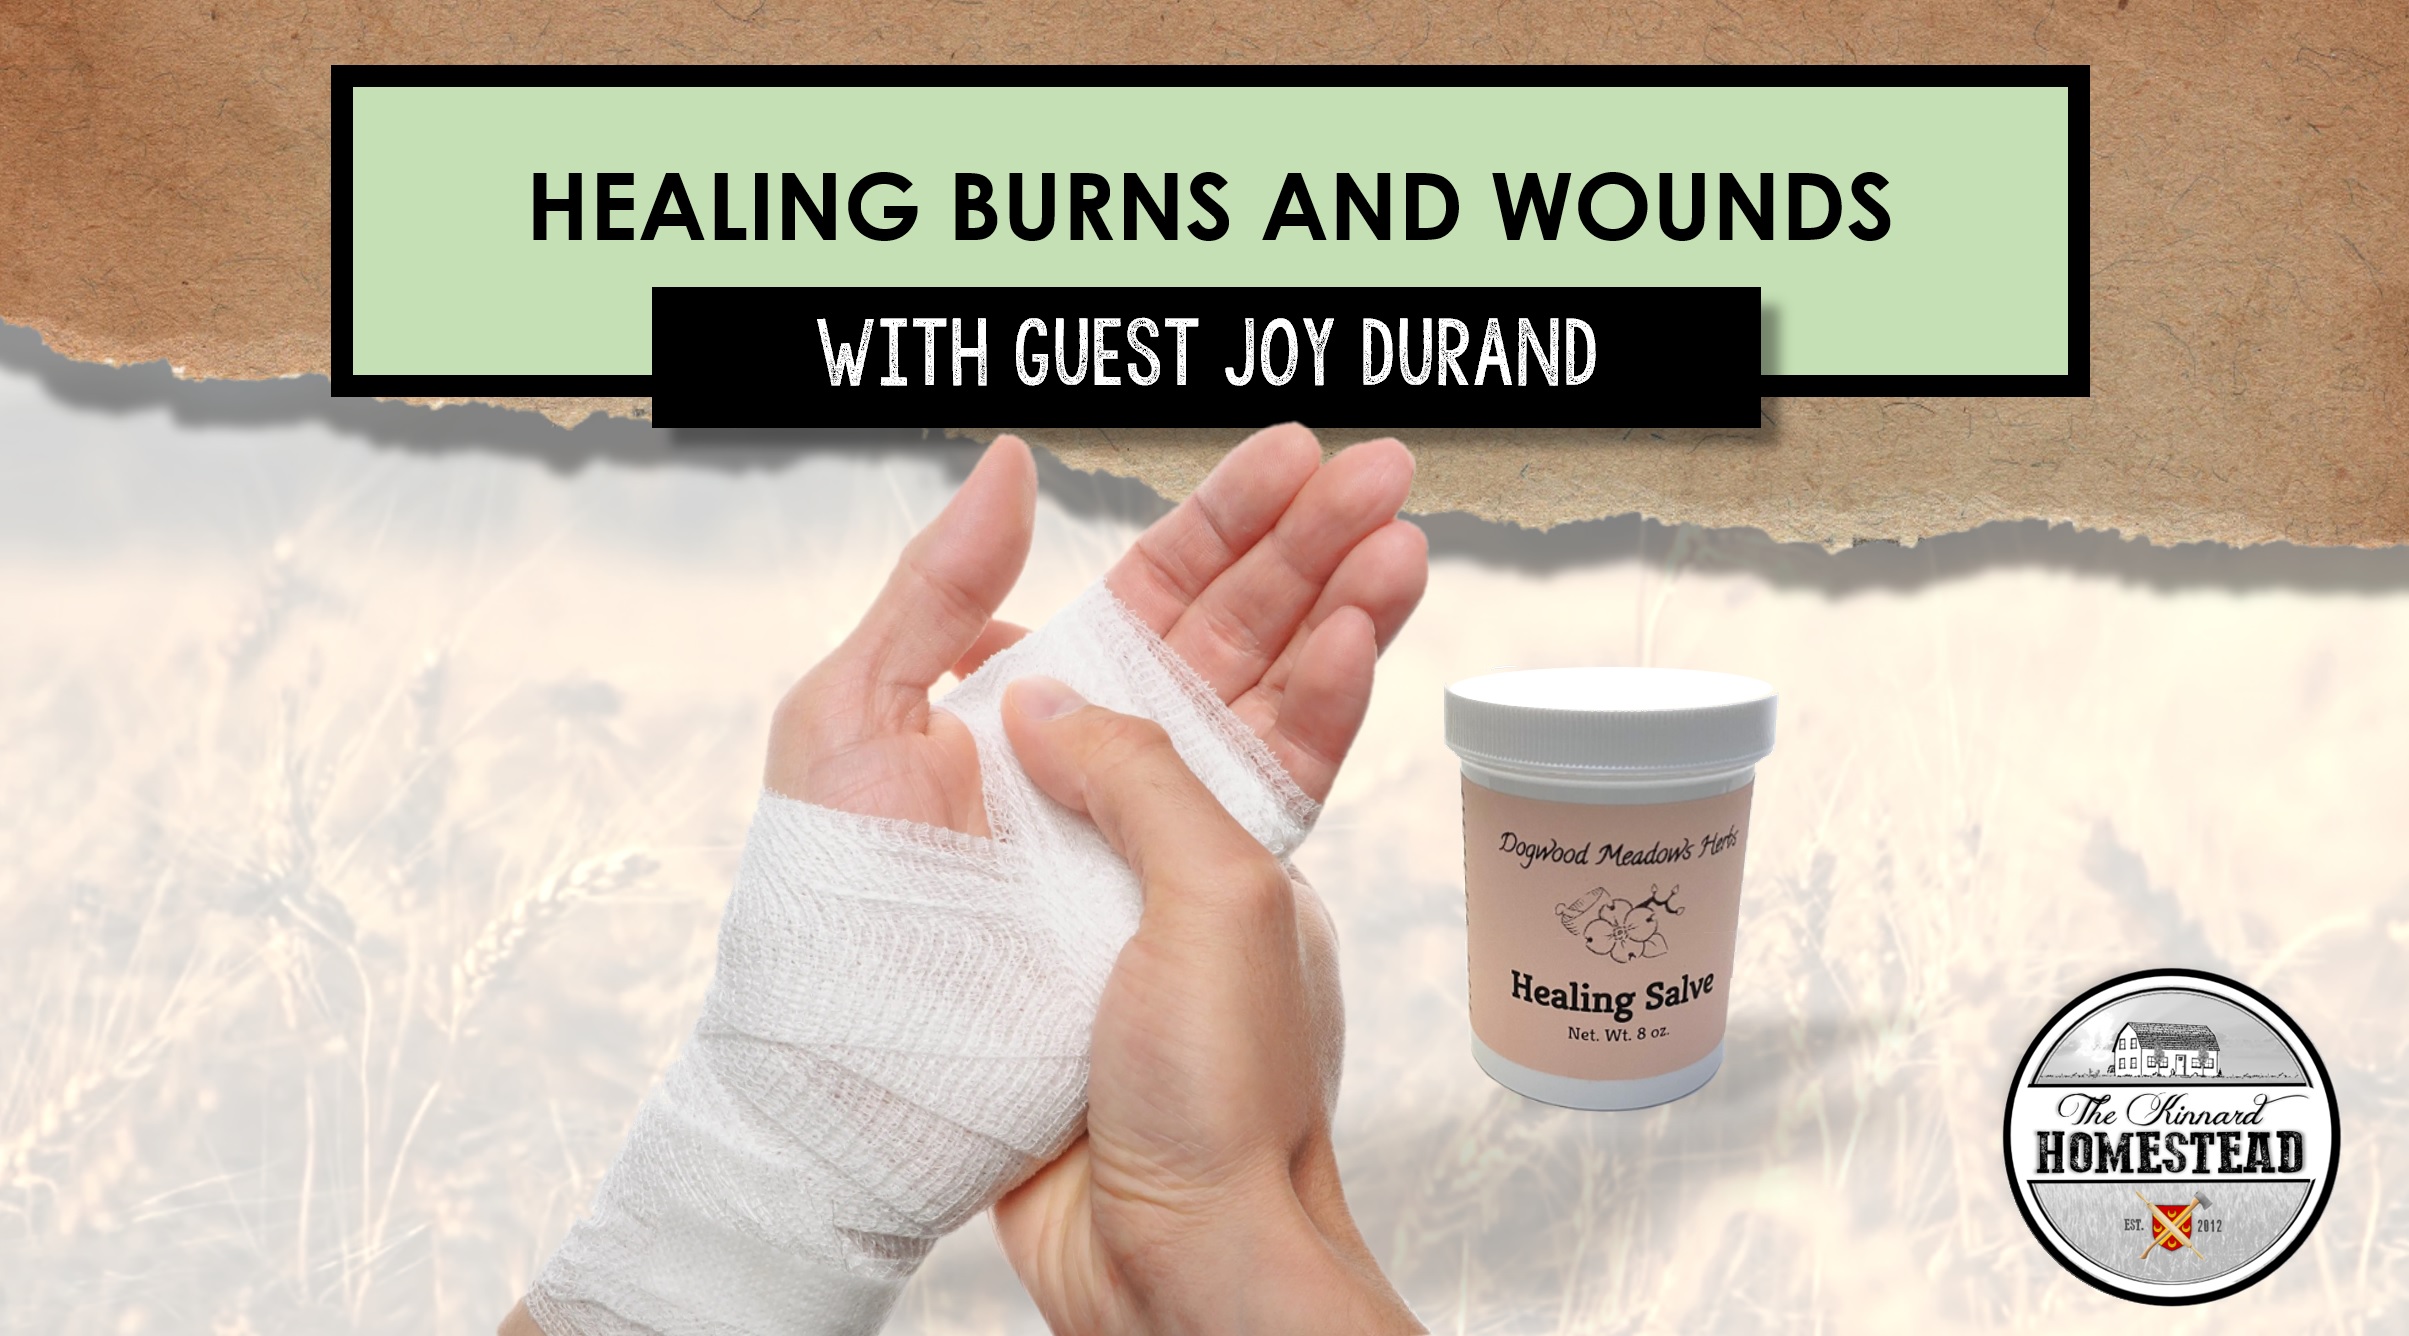
Amy: There are so many different nuggets of wisdom and insight I know you could give us about tinctures and different herbal remedies, but in this episode, I want to focus on the events and the journey that led you to having the miracle Healing Salve in your store and why it's one of the main items you keep inside your family's medical kit.

Joy:    Well, that's a really long story, but I'll try to give you the short version.

So, I guess it all started with Mom getting cancer and then she started researching a lot of natural remedies and such.  And we just kind of jumped on board and kind of went down that road with her as we started having kids.  The more that I read, the more interested I became in a lot of herbal remedies, so I started experimenting and making tinctures and syrups and just trying to see what would help our family the best…what would work what didn't work… was a lot of experimentation and not in a bad way. You know, if they were really sick, we would go to the doctor. But this was, you know, minor things like colds or little bruises.  You know, just the normal things that kind of come with the Healing Salve though we came across that when I was reading some new books that I had gotten a long time ago—Be your Own Doctor by Rachel Weaver.  I've collected all four of her books now, and they have been so invaluable to me and our family.  I'm just so thankful for the blessing that they've been. Just the information that she's provided, and she's been very generous to share. And in her books, she talks about having a first aid kit, or, you know, just being ready being prepared having a medicine cabinet and such. And in 2014 we moved into a camper as a family just because we wanted to travel around the U.S. and see different places.  You know give the kids a first-hand education of history and just the land that we live in—national parks and such.   And before we moved into the camper, I knew that I wasn't going to have my big full kitchen like I do in the house with all my resources, and so I wanted to be prepared for how we were going to be living. So, I made all my tincture syrups and such and got them all prepared and ready for my first aid kit to be in the camper. And as part of that kit, I had some Burn and Wound Salve that Rachel Weaver recommended for burns and wounds. It was then that that we started using it little by little… just minor things like sunburns, you know after hiking at the national parks or such, you know things like that. But I had never really used it on anything serious until about the middle of 2015. At that point we had an accident, a very severe burn on my 5-year-old daughter and that was when we got to see how the Burn and Wound Ointment worked, and it was truly amazing and just a blessing from the Lord.

Amy: Can you tell us what happened when your daughter was burned?  Paint the picture for us what did what did that look like. What happened?  What were the thoughts that went through your head?

Joy:    Well, what happened when the accident happened; basically, she was burned by some boiling water, scalding water. I had just poured two tall thermal, you know stainless steel thermal mugs, with some boiling water because we were going to have tea, and the countertops in a camper are very small, so they were sitting there on the countertops. And at the time we had 7 kids.

The youngest baby was about maybe 5 months old or so, and my 5-year-old daughter was holding him and just, you know, playing around with him bouncing him on her hip there in the little living room.  He reached out to grab one of those mugs, and she spun around trying to protect him from it but in in doing that they got knocked off the counter and they spilled on her.  And this literally all just happened like in one minute, because I had just poured it just in that short amount of time. That's when the accident happened, and it burned the majority of her upper right arm and the majority of her upper right leg pretty much all over.

You know she was screaming quite hard; it was very scary to hear, and it was just horrible.  That's how, I can just tell you it was horrible.  It's not like when your kids just fall and bump their self or fall off their bike or whatever, you know, when they cry like that.  It was worse than that, and so we put her in the bathtub and tried to cool off the burn as much as possible to get that heat out of the burn. We took her pajamas off, and when we did that, the skin just was coming off in layers, just falling right off her arm like a big sheet and off her leg. And there was one spot on her arm that was like a pit. Almost, I think, more like a third degree burn really, because it had gone through several layers of the skin.  I knew that we were looking at something very serious.  I did remember during all that time, you know all that time, it was a very short amount of time—just a few minutes, but I remembered enough to know that I needed to cool the burn.

So that was the first step. And in that amount of time, then I was able to sort of think a little bit about what do we do. Do we go to the hospital? Do we you know try to do something here?  I didn't know at that point because you're just trying to sort things out.  So, I went ahead and grabbed my book off the shelf because I did have my book with me the Be Your Own Doctor book, and I looked really quickly through the burn section.  And you know, there's instructions in there, very good detailed instructions in there, you know here's kind of some guidelines about how to decide whether to seek medical help depending on the percentage of the body burned and just different guidelines that you can look at to kind of assess the situation and that really helped me be able to know what to do.  So, I kind of assessed that maybe like almost 20 of her body had been burned, you know maybe less than that, but it was severe but not so severe that we needed to rush her to the hospital right then and there. I did have a small container, an 8 ounce container of the Burn and Wound Ointment, so we went ahead and got her out of the bathtub—probably about 15 minutes she was in there, and she just got so cold—so we went ahead and got her out, gently patted her dry, and slathered that Burn and Wound Salve on her.  And at that point, she did stop crying, because the salve really it helps the pain go away within 30 seconds.  I mean it really decreases it to the point where you have comfort and you're soothed even though I'm sure there's still pain there. I can't imagine.  I've never been burned that badly, but it was soothing enough that she stopped crying.

During that time my husband had gone and run to the store for bandages and got some non-stick bandages, and we wrapped her up, and she went to bed for the night.  Of course, I didn't go to sleep very well because I was worried about her and wanted to keep checking on her and making sure she was okay. I also, you know during that time, we wanted to be careful and make sure that she didn't get an infection or get dehydrated or have any of the signs of shock or anything like that, because those, especially infection, is a number one complication of burns.  So, we were ready and alert to just go to the hospital whenever we needed to, but we wanted to try this gentle way of healing.  And I can tell you, it was a huge blessing both for us and for our daughter, because she was able to heal in a much more painless way, I believe, than if we had had to do the hospital procedures.

Amy: Can you tell us how did you actually go about treating the burns after you saw and you were able to ascertain the severity of it how much of it had been, you know, covering her arm and leg?  What did you end up using in order to keep the infection at bay?

Joy:    We went ahead and called a store in the Amish community in Pennsylvania, and we ordered a half gallon of salve and burdock leaves—some dried burdock leaves, and talked with them about this treatment protocol that we had learned about in the Be Your Own Doctor books. They had been through it several times through just different accidents that had happened in their community, so they already had more of an awareness of what to look for and how things should be progressing as she healed. They were a huge help!  We got those supplies from them—we got them overnighted, and we started using them.  We would change the dressing twice a day every 12 hours.  When we would do that, we would lay gauze pads— clean sterile gauze pads—on the wound or the burn, and then we would gently pat them and then gently lift them up.  And this was to clean away any dead skin.  Sort of similar to what they do in the hospital with the scrubbing with the antimicrobial soap.  Instead, we were just doing it gently and not scrubbing.  We wanted to get that decay off of there without having to be rough on the skin, on the wound, and so we would do that.  And then we'd spray it with Colloidal Silver to cleanse it. We wanted to do that instead of the peroxide, because peroxide stings so badly, and we just wanted to do something that would cleanse it without being damaging at the same time.  And so, we're just very careful with this gentle situation on her skin.

And then after that, we would again lay some gauze on there, another clean sterile piece of gauze, gently pat it, lift it off, make sure that it's getting any residue left behind just to get anything off of there; and then we would reapply more salve— a very thick layer about an eighth inch, maybe even a quarter inch because I like to be very liberal with it. But we would slather that all on, and then we would wrap that with some re-hydrated burdock leaves which also help in covering the wound instead of covering it with gauze that would, you know, pull maybe be a little bit more harsh on the wound.  These leaves are very gentle, and they hold the salve there to the skin.  And then when you take them off at the next dressing, then it brings that dead skin away off of the burn.  And so we would lay that on there and then we'd use some chuck pads cut up and wrap that around it to have some kind of an encasement, and then, you know, wrap that with gauze to tie it all up into a neat little package.  So, we would do that twice a day.  And when we would go through that process, I washed my hands probably five times between each step, because I wanted to make sure anything that I touched was clean and sterile, and that I wasn't transferring any type of bacteria between the tools, the scissors, the stirring knife, or, you know, anything that I was touching.  I didn't want to take any chances on any kind of infection getting into her body.

Amy: How long would you say it took for the burn to heal and was there a lot of scarring when you were using the Healing Salve, Burn and Wound Salve?  How effective was it?

Joy:   Well, she healed very rapidly in less than two weeks. It was very quick, and the scarring really, you know, you can't tell that she had a burn.  You know initially when she was burned, the skin looked brown.  I guess, you know, it wasn't black like what a fire would do, you know, charring the skin; but it was brown, a dark brown. And then as she healed, those new layers of skin just grew on top and became smooth as if it had never happened. They became smooth—for a while you could kind of see a border line of just color kind of variants between where the edge of the burns were—but they were still pretty much the same color as her skin. And now I can hardly even tell!  And the only place that I can tell there was a burn is the place where she had about that quarter size third degree burn that was a deep hole.  And now it's not a hole, it's not a pit at all.  It filled in from the bottom up with new skin growth, new tissue, and it grew all the way up to the top layer of her skin.  And so that area is completely smooth.  The only thing that you can tell is it's white; it doesn't have the color pigment of the rest of her skin so it just looks like pure white skin.

Amy: So, it pretty much proved how effective it is as a burn salve.  But as the years went by, how would you describe your experience using it then for other purposes?

Joy:    Well, I think we might be prone to accidents in our family. I don't know…I'm not sure, but a few years ago our son, who is probably about 9 at the time, we had just gone swimming, and we were racing back to the house down the road.  We had been in a neighbor's house.  And so we were racing back down the road, and, you know, our road we live on a hill so it kind of goes downhill.  He was going as fast as he could, and he fell.  And when he fell, he hit the asphalt with his knee right above the kneecap.  His whole body just hit in that one place. All that force in that one place, and it made a huge wound—I would say about maybe two inches wide open and then two inches across maybe three quarter to an inch deep maybe, because it was so deep, I felt like I was looking down in it like not being able to tell what I was looking at down there, because it did not look like the top layers of skin.  So it was yucky. It was very ugly.  You know, we first immediate reaction was, “Oh, we have to go get stitches!” because I thought, I don't know what we can do about this.  We've got to go stitch it up and close it up.

So he was sitting on the edge of the bathtub cleaning it out.  You know, I've taught the kids, you know, you need to clean your wounds, and, you know, make sure there's no rocks or anything in there because they've fallen off their bikes and stuff a bunch of times.  And so, we were just looking at it trying to make sure there was no foreign objects in there.  And really the bleeding was surprisingly minimal from what I remember.  So anyway, we were doing that, and I had immediately gone and said to my husband, “We have to go get stitches,” and then I started trying to think what do I have here that could work in the time being.  You know, what could we use?  And then I remembered the Burn and Wound Ointment. I don't think it immediately came to my mind, because I was so used to the burn experience and that idea of just using it for burns, but it is useful for so many things.  Since then I've used it on diaper rashes with great success, and I know people use it on chapped lips and sunburns and all— it's just a great first aid ointment—bruises, just all kinds of things.  So anyway, we got the Burn and Wound Ointment out, and we packed his wound with that.  This time we did not use burdock leaves, we just used non-stick gauze pads and then wrapped gauze around, but we did change his wound twice a day.  We did the dressing twice a day, every 12 hours, and we just followed the same method.  We just made sure everything was very clean, my hands were clean, all the time between touching anything, you know, sterile, and you know the tools, just everything was kept very clean.  And then we used the same Colloidal Silver to clean the wound out.  We would use a clean piece of gauze to gently pat on there and lift it off. So, it was really the same type of principle. And what happened with him is it took a longer amount of time to heal. I believe because the wound was so deep and possibly maybe, because we didn't use leaves. I don't really know for sure if that had anything to do with it because the burdock leaves really do help heal along with those properties that the leaves have as well.

It took about a month and a half to heal, but it was so much fun seeing how the wound would get smaller and smaller every few days.  It was like, it was just amazing! It would close itself up little by little.  I wish I had a time-lapse video; it would be so neat to watch something like that.  It just little by little closed itself up as if he had stitches, and it brought itself together into this incision.  It looks like he just had this incision, so he has a scar, he has a line of a scar, but he does not have those scars that you get from stitches —you know all those little holes that you get on both sides of an incision because of where the stitches were—he doesn't have any of that.  It's just a nice clean scar.  He's done well with it.  It's been really good!   And since then, we've used it on bad finger cuts and bruises just anything that we need it for first aid.

Amy: So, we've mentioned burns, we've mentioned severe wounds, we've mentioned sunburns. Also, I think even from our own personal experience that dreaded hill the same one that your son tripped on my son, my youngest, had an experience with that.  And boy, he had a goose egg on his forehead. And I'll never forget bringing him in and sitting him on your counter, and here comes Aunt Joy with her medicine kit.  And you whip out that, you know your Healing Salve, and some big ol’ bandage, and well you lathered it up and covered it with a bandage.  And less than 24 hours later you couldn't even tell that there was anything there.  There was hardly a bump; the bruising, the dark color that had started forming when he had first fallen, it was a faint greenish yellow as if it the bruise itself was over a week old.  It truly is what people call it like the, you know, “liquid gold” or “the miracle salve” is what I've heard some customers of yours calling it. And they're absolutely right!

But speaking of all the different names that we call this, just to clarify, I know at the beginning we call it Healing Salve and then you've been telling the story and calling it Burn and Wound Ointment.  How did this all come about?  Are we talking about different things, or is it all one in the same?

Joy:    Well, they are the same stuff, and I'll tell you, I want to tell you too a little bit about this salve. The salve the foundation of it is honey, and it's an important ingredient in it because honey is antibacterial, and it's very nutritive.  It speeds up healing so one of the things that it does is that because it absorbs water, it takes water out of the surrounding bacteria and that bacteria dries up.  So, the bacteria can't live, can't grow, it can't multiply so easily in that kind of environment.  And then the glucose in honey converts to hydrogen peroxide, which is just amazing to me.  So, we have this cleansing quality in the honey that's, you know, we first have the wound kept from infection, and then we have the wound being cleaned by the honey, and then the honey also has tons of vitamins and minerals and things that help the new skin to be growing.  So, we have all that going on.  And then in addition to that, we have all these other herbs that are in the in the Healing Salve that help with so many different things.  You know the comfy root it helps that cell regeneration it just it puts it on high speed and promotes it to happen very rapidly.  So, we have that and then there's other herbs in there that help to shrink the inflamed tissue and to strengthen the new cell growth. Then, like for example, the lobelia in there. Lobelia is great for pain relief and for just relieving sore muscles and different things like that. The addition of lanolin into the Healing Salve is what keeps the salve from just melting and running off your skin.  So, that's really important too. And then we have the other oils like the wheat germ oil, olive oil, all these other things are to help prevent the scarring which the honey also does too.  And so, it's so neat how a wound can or even a burn, a third degree burn even, can start this new tissue growth from the bottom of the wound inside and build itself up all the way to the top again.  And because of this, that's how we have found that this has been such a great salve to use, and we've used it for so long now, I guess maybe 8 I don't know 8 years maybe almost now.

But what we did is last year since we've loved it so much and just seen such amazing results, we wanted to make this available to those around us to our people locally, friends, businesses and get them to where they could have access to it and use it and have good results with it as well.  And so, I contacted the manufacturer, and this is made by the Amish community, and they've been so kind. They have allowed us to resell their product, and they are re-labeling it for us with our business name and just the name Healing Salve so they are one in the same product.  I would be happy if anybody got it from either place because it's just so wonderful, and everybody should have it in their medicine cabinet.

It's just, it's truly a blessing to be able to have something that works, and you know, it saves you money in the long run really, because, you know… To give you an example, that whole two-week treatment that we used for the burn, the severe burn on our daughter, it only cost us $500.  That included all the bandages, and at that point, my husband was going to stores that sold surplus bandages or you know bandages in bulk medical supply stores where he could get it cheaper. And so all of that put together was only about $500. You know, it's it makes a difference when you can treat something on your own, and of course, we're always ready to seek help when needed.  And that's the blessing too, that we can do that when needed.  But I just want that to be available to people, and that's how we came across it and where it comes from.

Amy: Joy, thank you so much for taking time today to share with us such great information. I seriously cannot wait to have you back with us again!

For all our readers out there, I hope this episode was a help to you in some way.  If you'd like more information about Joy Durand and the Healing Salve visit her website at www.dogwoodmeadowsherbs.com or www.thekinnardhomestead.com.  Until then, God bless you.

Assets vs. Liabilities: The Key to Building Wealth

There’s a helpful financial principal I picked up on from an author named Robert Kiyosaki, and though I can’t say I’m on board with everything he writes about in terms of financial goals and strategies, I do find this one very useful and easy to understand. If you’re familiar with his materials, Kiyosaki talks a lot about the fundamental goal of “getting rich” and the practice of “leveraging debt” as a primary means of building wealth.  Personally, I don’t think becoming rich should be one’s underlying motive for stewarding their resources well.  I’m also a little uncomfortable with the philosophy of investing on credit as a wealth-building, cash-flow-building mechanism.  I understand the math behind it and think there probably is a place for what he’s talking about, but, for the average joe, I’d push all of that discussion to another day.  I just mention it in the event you have read any of his books. If there’s one principal to wrap your mind around, Kiyosaki would say the number one rule is this:
“You must learn the difference between an asset and a liability—and buy assets.”
Most people think they already know the difference between an asset and a liability.  As they were taught in the simplest of terms in Economics 101, an asset is something you “own” and a liability is something you “owe.”  With that understanding, the money you have in the bank and the possessions you have piling up around your house are all assets with a certain monetary value.  Likewise, the note you’re carrying on your car, the mortgage you have on your house, and the balance you still haven’t paid off on your Credit Card are all liabilities.   That’s one way of thinking about assets and liabilities.
According to Kiyosaki though, if that’s your definition of assets and liabilities, chances are you’re not going to get ahead financially.  At least, not significantly.  A few dollars sitting in your bank and the pile of junk spilling out from your closets don’t produce wealth.  If anything, they hinder your ability to produce wealth. How is that?  Consider the $1000 sitting in your savings account.   First of all, it’s a great thing you’ve saved the $1000, or however much you’ve saved.  I believe everybody needs to have a cash reserve in the bank—I can talk about that more another day.  But if a savings account is the only place you put your extra money, it does about as much good as a pirate who buries his treasure in the sand on some distant island.  All it’s doing is sitting there for the day you decide to come back to get it.  Some of it may even start to erode by the gradual tides of inflation. Furthermore, if you think buying more stuff increases your net worth, just do the math on how much you’re paying (or have already paid) to afford the extra square feet to store it, or the cost of electricity to run it, or the amount of gas to fuel it, or the price of repairs to maintain it, etc.   You may not realize it, but much of what you own really owns you, and what you think you paid for once at the store you’re actually still paying for in storage, usage, maintenance, and repairs. Therefore, a better way to think about assets and liabilities isn’t to define them in terms of “owning and owing” but in terms of “gains and losses.”  Or, simply explained,
“A true asset is something that puts money into your pocket, and a true liability is something that takes money out of your pocket.”
Kiyosaki argues that those who are financially successful, as a general rule, apply their dollars not on liabilities, but on assets.  They don’t waste the bulk of their paycheck on things that have a draining or “costing” affect, but on things that have an accumulating or “earning” affect. By this definition, unless steps can be taken to turn them into money makers, nearly everything you own—including your house, car, electronics, appliances, furniture, go down the list—are all liabilities, assuming they’re costing you something to have them. So, the key is to turn what you have and where you invest your money into earners.  How do you do that?  It takes developing the mind of an investor, or an entrepreneur.  Rather than letting the dollars in the bank collect dust (or, at best, a few pennies in interest), how can you safely invest them?  Instead of treating your home strictly as a home, how can it be used as a small business?  Instead of buying more knickknacks to put on the wall, what kind of products or services can you develop to earn an income by? More could be said on various ways of applying this principal, but everyone’s situation is different.  Suffice it to say, if you can learn to invest your earnings in things that generate their own earnings, you’ve created assets that build wealth instead of liabilities that drain wealth. The person who can grasp that concept and find ways to implement it, I imagine will make great progress in their financial situation.  So, remember the true definition of an asset the next opportunity you have to spend or save your money.  If there’s a way to make those dollars make more dollars, you’ve just discovered the key to building wealth. Remember, “a true asset is something that puts money into your pocket, and a true liability is something that takes money out of your pocket.”[/vc_column_text][/vc_column][/vc_row]

How to Make Soap: A Beginner’s Guide

No two soaps are created equal.  That’s because each ingredient added to an all-natural soap does a specific job.  But how do you find the exact soap you or your family needs without breaking the bank!?!  Unless you have the ear of a soap maker who owes you a favor or two, your best bet is to learn how to make soap yourself.

Yes, working with lye can be dangerous and learning all the rules and purchasing all the different supplies…yeah, it can be intimidating, but when it all boils down to it – it’s WORTH the effort.  Working with lye is no more dangerous than mowing your lawn in the south during snake season.  I know for all you Southerners out there, you know what I’m talking about.

You’re not going to be out there in flipflops when you’ve got Copper Heads nearby and Moccisons.  Oh no, you’re going to wear the proper shoes.  And in this case when dealing with lye, you wear safety glasses, long sleeves, and rubber gloves.

To overcome your phobia, you first need to better understand what it is you actually fear. Now the reason lye is dangerous is because it can cause severe burns if it comes into contact with your skin. No, it’s not an acid.  It quite simply is a chemical reaction. You see, lye absorbs fats/oils upon contact.  So when a drop of lye touches your skin cells, it immediately sucks up all the natural hydration in the skin leaving a “burn.” This process in soapmaking is called saponification.  It’s the chemical reaction of the lye absorbing the fats/oils to create a substance that cleans by altering the pH.  Hense where you get the word “soap.”  It’s simply because the lye and fats have gone through that chemical reaction – saponification. Not enough lye leaves a soap that dissolves rapidly and is mushy from excess fats/oils not being saponified. And let’s not even get into the kind of “soap scum rings” that’s go leave in your bathtub. Eww! GROSS! Too much lye will leave your skin so clean it feels dry or cracked.  So there’s a balance there.

The same way you would treat a boiling pot of water is how you should really treat a container of lye. You don’t want to be around pets or small children who can knock into you while working. You moms out there with toddlers or little ones, you know what I’m talking about….How you’re going to take a step back and your child, like a phantom, likes to sneak up right behind you so when you go to take a step back, you’re like “Ah!” and you either drop it or it spills.  That’s what I mean, common sense.  Leave the kids and pets in another room just to make sure you don’t have an accident in that regard.  But that’s it in a nutshell. That explains the danger of it all. … As and my children like to quote G.I. Joe from the 1980s cartoons, “Now you know, and knowing is half the battle…G.I. JOE!!"

Now that you’ve made up your mind to brave through your fears, how much is it going to cost you up-front to start making soap?

To make one of the simplest types of cold-processed soap you will need:

Ingredients:

  • Distilled water - $0.89 (1-gallon @ grocery store)
  • 100% Lye – $3.49 (16oz @ local hardware store)
  • Coconut oil - $20 (1-gallon @ com)
  • Essential oils – optional and prices vary

Tools:

  • Silicone spatula - $1 (Dollar Tree)
  • 2-Cup plastic measuring pitcher - $1 (Dollar Tree)
  • 1-gallon mixing bowl - FREE (recycle an ice cream bucket)
  • Small bowl – FREE (recycle a sour cream or whip cream container)
  • Rubber dishwashing gloves - $1 (Dollar Tree)
  • Digital Scale - $15 (price varies, but a decent one can be found around this Needs to be able to show 0.00 oz.)
  • Stick Blender - $15 (price varies, but you could snag one around holiday sales for $5-10)
  • Thermometer - $20 (price varies, but I would recommend splurging on a digital infrared thermometer)
  • Soap Mold – FREE (use an old USPS medium flat rate box or any shape container you want that can be lined with parchment People like to use Pringles cans or PVC pipes to make round soaps.)

*Very important to remember that whatever you use for making soap CANNOT be used for any other purpose.

Probably just looking through the list of needed supplies, you can cross off a bunch of things because you already have them inside your pantry or kitchen cabinets.  The amounts and prices I’ve listed are enough to make 2.5 batches of soap.  Using the following recipe we’re going to formulate, these ingredients are enough to make a total of 35 5-oz bars of soap. A bar of all-natural soap costs around $5-7 at the store or craft market.

So if you bought that same amount of soap at the store, you would spend $175-245 just for bars of soap. Altogether, your ingredients and tools cost you less than $100.

Now to put all the pieces together and start building your soap formula…

Step 1.

Do the math calculations to determine the volume and oils needed for your batch of soap.

Square or rectangular = Width x Length x Height x 0.4 Cylinder = 3.14 (π) x Radius x Radius x Height x 0.4

*Using an old USPS Medium Flat Rate Box as a mold with dimensions of 11 x 8.5 x 5.5 x 0.4, I’m going to change the 5.5” height down to 2” because I don’t want my soap to be that tall.  So the final equation is 11 x 8.5 x 2 x 0.4 = 74.8.

Step 2.

Take this number and plug it into an online calculator to get the correct amount of each

oil.  I typically use www.brambleberry.com’s lye calculator, but have also tried out others out there that have a better list of usable ingredients.  For instance, Brambleberry doesn’t have lard listed as one of the fats/oils.  It’s kind of a bummer since I like to make old-fashioned lard soap since we have our own pigs. You know, you use everything you can. However, the Brambleberry site is one of the simplest to use, so for this example I’m going to use the Brambleberry site. Once you are on the site, you’re going to look for the “lye calculator.”

Scroll toward the bottom of the page and answer the questions:

Type: solid…It’s going to be a solid soap not liquid.

Please Select Ounces or Grams…: percentage

Weight of Oils: 74.8 oz (We know this is the volume of the mold, but we have yet to figure out what is the actual amount of the coconut oil.  The 74.8 gives us a starting point.)

Superfatting Level: none (It doesn’t matter at this point; I’ll show you how to calculate your own later and I’ll explain what in the world superfatting is. Haha!)

After clicking “next” you get to decide on the percentage value for each of the oils you would be using.  Because we are doing the most basic recipe, it’s not going to have a breakdown of all the different kinds of oils to use.   Instead, just enter 100 coconut oil then click “next” at the bottom of the page.

SIDE NOTE: Typically, you would want to break a recipe down into percentages like 33% olive oil, 33% coconut oil, 15% shea butter, 15% sunflower oil, 4% castor oil.  All of that to add up to 100 percent.  A typical bar of soap is going to contain certain elements that do certain things. You can do more research on your own about the benefits of each different type of fats/oils and the best percentage used for in soaps to get the results you want. That’s something that you need to do on your own if you are serious about getting into making your own soaps.  I just want to be able to show you how to know or give you the resources or tools so you can take that next step to make your own soaps yourself.

You will see that it gives you a “Total Batch Yield” of 117.11oz which, good grief, is almost double the volume of your mold.  Click at the bottom “resize batch” and guestimate what you think the oil amount will be.  Keep resizing the batch until you get the total batch yield down to 74.8. In this case, the final oil weight would be 48oz which gives you a total batch yield of 75.65oz.

Now, scroll up to the section that says what your oil amounts are and write down those numbers next to each ingredient.

Coconut oil – 48 oz

Now look at the amount of liquid and lye and write those numbers down as well.

Lye – 8.54 oz

Liquid – 19.11 oz

Step 3.

There is where the math comes in…Double check the lye amount using a Saponification

Chart and multiplying the amount of oil ounces by its amount of lye needed. Now I’ve attached a pdf of my favorite NaOH chart that I’ve had the most success using down below so you can see all the values needed to calculate the lye for a bar of soap. (FYI: in case you search the internet for a chart, keep in mind KOH charts are used to make liquid soaps and have different values.)

Now the reason doing your own calculations is so important is because…For example the first time I made a recipe of soap that I had found, I plugged in all the information on the Brambleberry website.  I followed it to a “t.” The problem was my soap didn’t turn out, and I was so aggravated. I was like, “Good grief!  I just wasted all that time and money..aaahhh..Why didn’t this work?!?!”  It drove me bananas! Well, through my research I stumbled across a book and in it she had the full list of saponification chart and was explaining how everything works, blah, blah, blah…But as I was looking at that chart, I matched it up to what the recipe was that Brambleberry had told me, and I did the multiplications on there.  I multiplied the saponification chart from the book that was listed with my oils, and it was different.  Now I did that for the entire recipe. I went through and redid the calculations, and when I made the recipe again, it worked.   I didn’t have a failure.  It turned out perfect. That lesson taught me that online lye calculators are not always right, and there are so many different variations for saponification chart floating around out there on the internet that it’s insane.  So that’s why I’ve listed my favorite one that I’ve had the most success with. I have not had any failed attempts when I’ve done my calculations, my soaps turn out correctly.  Again, some people are like, “Oh well, it doesn’t matter.  It’s only off by a tenth or a hundredth,” but that all adds up in my mind.  So I want to stick with the one that I’ve had success with and that’s what this is that I’ve posted below.  But on this chart, she uses 0.190 for coconut oil. That means that for every ounce of coconut oil, you’re going to use 0.190 oz lye. So you multiply that out.

0.190 Coconut oil

0.190 x 48 = 9.12 – That’s telling us we’re using 9.12oz lye.  You can already you can see that it differs from the online calculator gave a different total

Step 4.

Superfatting…This is the term used when you allow a certain percentage of fats/oils to not be absorbed by the lye during saponification.  They are going to remain in fat molecule form. This is another big way in which making your own soap can be customized.  You can control the moisturizing affect of the final product simply by adjusting the superfatting level.  This will also affect the amount of bubbles/suds your soap will produce. Too much and the soap becomes slimy and the bubbles are inhibited.  Not enough, and the soap leaves the skin feeling dry because it cleans off the natural oils in the skin and doesn’t replace them with any. So superfatting is crucial

Take the final amount of lye needed (9.12) and multiply it by the percentage you choose. (Majority of recipes are superfatted at 5%. You would want to increase it to 15% for this high coconut oil soap.

9.12 x 0.15 = 1.368

Now subtract that amount from the total lye. (9.12-1.368 = 7.752) Round to the nearest hundredth and you end up with 7.75 oz.  THIS is the needed amount of lye for your batch of soap.

With the accurate lye amount, adjust your liquid measurement to match.  The liquid/lye ratio is 2:1.  So for this recipe you will need 15.5 oz.

FINAL RECIPE:

7.75 oz – lye

15.5 oz – distilled water 48 oz – coconut oil Total Weight = 71.25 oz

*Because of the change in lye and water amounts, the total weight went below the 74.94oz we were working toward earlier.  You can either leave it at this weight, or you can go back and readjust your oil amounts. Just remember to re-do the math on each step if you change just one oil amount since it will change the amount of lye and water needed.

Yay! You just formulated your first batch of soap!!!!

Step 5. – Mixing the lye solution

Now to actually make your soap. Ha! Maybe take a short break to let your brain cool off after all the calculating…

Set out your supplies in a well-ventilated area.

Put on your safety gear and cover your work area with a trash bag or newspapers to protect the surface you are working on.

Using a digital scale, place your 2-cup measuring pitcher on the scale, set to measure in ounces, and press “tare” to zero out the weight of the pitcher.

Measure out the needed amount of COLD distilled water and set aside.

Place your empty small bowl on the scale and press “tare.” Measure out the needed amount of lye being very careful not to spill the granules.

If you are in a well-ventilated area, slowly pour a little lye at a time into the water, mixing with your spatula.

NEVER POUR WATER INTO THE LYE – MUST BE LYE INTO WATER UNLESS YOU WANT A VOLCANIC ERRUPTION INSIDE YOUR KITCHEN!!!

(Go outside if you need better ventilation as this part is the worst part when it comes to chemical smells.)  You will know the lye is completely dissolved when it turns clear and there are no more little white pieces floating around.  At this point, leave the spatula inside the pitcher and place inside the refrigerator while you begin prepping your oils.

Step 6. – Measuring the Oils

Place your empty gallon ice cream container on the scale and measure out your coconut oil.  Place inside microwave and heat in slow bursts (15-20 seconds) stirring between each round until the oil is transparent.

Place the container back on the scale and press “tare” to zero out weight. Slowly measure out the olive oil.  Do the same for measuring the castor oil.  Gently stir the oils to get a consistent heat.

Step 7. – Combining Oils and Lye

Use your digital thermometer to get a temperature reading for the oils and then the lye mixture inside the refrigerator. Combine the lye into the oils when both are between the temp of 120-140F with a difference of 10 degrees allowed between each.

Using your stick blender, “burp” the blender first to remove any air pockets before turning on. Slowly blend the mixture in 15-second bursts letting the blender rest.  If the temperature is correct, the soap will reach a light trace in a few minutes. (Trace is when you can dribble some of the mixture on the top of the batter, and it holds its shape.)

If you are adding any essential oils, now would be the time you add those.

Step 8. – Pouring into Mold

Once you’ve reached the medium trace, you need to act quickly to get the soap poured into your mold.  It will begin to firm up quickly as it cools.  Scrape the sides of the container clean then shake/tap the mold to smooth the batter into the corners and evenly across the top.

Cover with a layer of plastic wrap to protect the tops of the soap while it hardens.

A little tip here…If using a silicone mold that doesn’t have a wooden form, place it on a cookie tray so that you can lift the tray to tap down the batter.  If you try lifting the silicone mold on its own, it will just be a huge mess.

Step 9. – Gel Phase

Non-milk soaps need to go through a gel phase to create a consistent color and texture throughout the soap.  This can be achieved by placing your mold on a heating pad set to low and covered with thick towels for an hour.  Or you can wrap several thick towels/blankets around and set aside.  Check on your soap after it’s been sitting for an hour to ensure it doesn’t overheat.

Soap that gets too hot can bubble up like a volcano.  Better to have it be a little too cool than to be too hot.

Step 10. – Unmolding and Curing

Your soap will be ready to unmold after 24-48 hours.  At this time, you would cut into the desired bar sizes after unmolding.  Bars should be kept on a shelf to cure for 4-6 weeks to allow the excess liquid to evaporate and harden. Soaps are safe to use after unmolding since the entire saponification process has finished. Contrary to a lot of soapers out there who say that it’s not safe to use the soap until after the 4-6 weeks cure because the pH is still too high, there is no scientific proof to back up this claim. The curing process is there to harden the bars which will in turn make them last longer during use.  You can use the freshly unmolded soap in your shower, but it will dissolve faster.

In closing, just want to remind you that this recipe was one of the simplest and least expensive ones you can make by using only one 3 ingredients. This type of soap is not favored for washing with because it lacks the other oils that are more hydrating. However, it is still a great plain soap that does amazing at cleaning skin.  If you lower the superfatting level down to 0%, you then have an amazing plant-based laundry soap that can be shaved and added to other ingredients for a dry laundry powder or melted down to make a liquid detergent that is all-natural and very effective at removing dirt and stains.

Now that you know how to formulate a soap recipe and do the calculations, look through your kitchen cabinets or pantry and see what oils you have on hand in addition to coconut oil.

Some of the best are olive oil, sunflower oil, avocado oil, lard, tallow, sesame oil, hemp seed oil, and castor oil. But whatever recipe you find online or in a book, ALWAYS remember to do the calculations yourself and not just follow what someone else has written down.

I hope this episode is a help to any of you out there looking for ways to help save money for yourself and your family by becoming more self-sufficient in the area of soap making.

Spiritual Warfare on the Homestead

When it comes to farming, homesteading, and the goal to "live a quiet life, to mind your own affairs, and to work with your hands" (I Thessalonians 4:11-12), it's possible for a family to develop a false sense of security in their efforts to make progress in that direction.

It may be true a person has become more self-reliant and has learned to function quite fruitfully on their farm with a cozy hedge of separation between them and the outside world—safe from becoming overly dependent on (or influenced by) that outside world.  In their view, they feel they've done a good thing since, with every passing day, the world seems to slide further and further into sin and confusion.  Amy and I share many of those thoughts.

But, honestly, the guarded, self-reliant family out on their little farm is hardly removed from the dangers of a sinful world.  Even if it were completely off-grid and isolated from having any contact with anyone, it would still be in the line of fire.  How is that?  Well because, as Ephesians 6:12 says,

“For [our fight] isn’t against flesh and blood, but against the rulers, against the authorities, against the cosmic powers over this present darkness, against the spiritual forces of evil in the heavenly places.”

The real battle being fought and, therefore, the place where the real threat to our families exists, isn’t just in the political arenas of Washington or the culture centers of Hollywood, but it’s creeping in the shadows on the front porch of the farmhouse too.  It’s hiding over in the tall grass at the edge of the field, waiting for an opportunity to pounce.  It’s already crossed the no-trespassing sign.  It’s already crossed the fence.  It’s already on the farm.

It’s already creeping in the garden and by the fruit trees, just as it was for Eve in the safe and peaceful confines of Paradise itself.  It’s already following our kids around the property as they’re doing their farm chores—as one feeds the animals, and the other picks the vegetables—just as it was for Cain and Able.

You remember the story.  Cain was making an offering from the fruit of the ground.  Able was making his offering from the firstborn of his flocks.  And, by the way, it’s worth mentioning all of that was in connection to the practice of Family Worship.  What can be more God glorifying than the wholesome practice of intentional family worship together?

But what happened out on the farm east of Eden?  Something went wrong.  For one reason or another, Cain’s offering was rejected, while Abel’s accepted.  And, in that seemingly God-glorifying act of worship together, Cain gets jealous.  He turns in anger against his brother with murderous intent.

To which, God sounds the alarm, right before Cain kills his brother, in Genesis 4:7, saying “…Sin is crouching at the door.  Its desire is for you, but you must rule over it.”

Anybody who lives out on a farm or a homestead, I’m sure, can relate to what it’s like when the chickens start to get picked off by the coyotes.  Or when the snakes slither into the coop and start eating the eggs.  Or when the kids are playing in the woods and that stray dog shows up again.

In the same way, sin is lying in wait.  “Sin is crouching at the door,” ready to pounce.  I Peter 5:8 says,

“Be sober-minded; be watchful.  Your adversary the devil prowls around like a roaring lion, seeking someone to devour.”

It’s the teaching of Scripture that sin and Satan—yes, I believe, in a literal spiritual realm made up of a literal devil and demons who, as Ephesians 6 said, is the real enemy pulling the puppet strings—but, the Bible tells us, both temptation and the tempter are closer than you think.   Like the predator hiding near the coop, a spiritual ambush awaits us.

In the book of Job, Satan is described as one who “wanders around the earth, going back and forth upon it.”  Going back and forth to do what?  Presumably to find people in vulnerable moments—and not just individuals, but entire family units—and to pick them off, virtue by virtue.  And sure enough, in an effort to take down Job, Satan goes after Job’s seemingly happy family out on the farm, with their 10 prosperous kids and all their acreage and all their many animals.

Job’s family and farm, as successful as it was, was anything but immune from spiritual attack.  Folks, the same is true for you and me.  Your homestead may feel far enough out, and self-reliant enough, that you can weather the next economic, political, or health crisis storm.  That may all be true.  But, I can tell you, you’re not far enough out, or self-reliant enough, to prevent  the next lustful thought, or the next outburst of anger, or the next lie your kid tells, or the next wave of depression, or the next bout of pride and self-righteousness you entertain as you think about how well off you are on your farm.  Oh, how the sin of pride is ready to take down an entire countryside of unsuspecting homesteaders!

If you’ve ever read the classic satire known as “The Screwtape Letters,” by C.S. Lewis, you may remember some of the strategies Lewis imagines the Devil uses to attack us.  If you’re unfamiliar, The Screwtape Letters is an imaginary exchange of messages between an older, senior demon named Screwtape whose writing to his younger, inexperienced nephew, Wormwood, about the best ways—the most deceptive tricks to use—in order to tempt man.  In one letter (again, speaking from the devil’s perspective), he writes,

“What we want, if men become Christians at all, is to keep them in the state of mind I call ‘Christianity And’.—Christianity and the Crisis, Christianity and the New Psychology, Christianity and the New Order, Christianity and Faith Healing, Christianity and Psychical Research, Christianity and Vegetarianism, Christianity and Spelling Reform. If they must be Christians let them at least be Christians with a difference. Substitute for the faith itself some Fashion [or fad] with a Christian colouring.”

In other words, one of the ways Satan tries to take down the committed Christian is by confusing their understanding as to what their Christianity really is.  Instead of believing the plain message of the Gospel that our salvation is by grace alone, through faith alone, in Christ alone, according to Scripture alone, for the glory of God alone, the strategy of the devil us for us to start believing the message of the Gospel plus something else.  It’s salvation, plus the campaign promises of the latest politician.  Or, the Gospel plus going to church.  Or, the Gospel plus a commitment to homeschooling.  Or, it’s the Gospel plus a quiet, self-reliant homesteading lifestyle.

Obviously, we need to look out for all different sins, but pride in one’s self-reliance, as commendable and well-intended as that is, can inadvertently lead a person away pure God-reliance, trusting in “self” above trusting in the Lord.  Folks, that’s the opposite of Christianity.

Satan wants us to put our faith in our 20 acres, and our new sustainable hoop houses, and our food pantries, and our well-stocked gun safes rather than a complete, 100% faith in God as our Provider and Protector.

Obviously, that’s not to say we don’t need to be about those other things—like the offerings of worship Cain and Able were participating in, they can be glorifying to God, but the moment we selfishly treat any one of them apart from a basic conviction that God alone is our Savior, we’ve become idolaters and all the fruits of our labor become an offense to God.

Again, our struggle is not against flesh and blood, ultimately speaking.  That is, it’s not against invading armies, or tyrannical governments, or lurking pandemics, or the potential of famines and food shortages.  The battle is in your own heart.  It’s in your spouses’ heart.  It’s in your kids’ hearts.  It’s already on the farm.

So, “be sober minded.  Be watchful.”  Know how to spot the prowling sins that threaten you, and take up arms against that.

I’m a Second Amendment guy like most other conservatives, but, listen, more important to me than the concealed carry under my belt, which is a part of getting dressed in the morning, and which I have had to use on some of those predators attacking my chickens, the more important thing I’ve got to remember to put on is the full armor of God that Ephesians 6 also talks about and all the spiritual preparation one must make in order to do something about the devil attacking my family.

If you know the passage, you know that armor is made up of virtue as a primary defense.  And lest we think all the Christian can do is hold a defensive posture and wait for the attack, the armor includes a sword by which we can even hunt down the enemy and regain any surrendered ground.  That sword, of course, is God’s Word.

Well, there’s a battle happening.  And, yes part of that battle is happening in the public arena in areas of government and culture, but it’s also happening out on the farm as well to a far greater degree than you probably realize.  Don’t be blind to it, but take up arms!

A Way to Navigate the Rat Race

I know for so many people out there, work can sometimes feel a lot like a gerbil wheel, or a rat race, in which you wake up every morning and do the same recurring thing over and over and over again with no real sense of accomplishment or progress.  And for years that's done without a second thought until one day—10, 20, 30 years down the line—you wake up one morning and finally realize that all you’ve been doing this entire time is run around  in circles and, in so many ways, you're still in the same spot that you were when you first got started.

The Goal of the Rat Race
That's not to say there's no sense of purpose to it all.  If you stop to think about it, even the most monotonous of rat races do have a purpose.  What purpose is that?   I think the universal goal of the rat race is two-fold:  First, it’s to find the cheese.   That can represent a financial goal, a career advancement goal, a life achievement goal, or any other.  Whatever the incentive is, a person is usually racing to find that.  Second, assuming they’ve found the cheese they were after, the goal of the rat race is usually to find the nearest exit, whether you want to call that “retirement” or “achieving  a certain set of circumstances,” or something else, in order to use whatever remaining time there is in life to enjoy, to share with family, or to generously give to those less fortunate some of the cheese you worked so hard to get.

The Big Trap of the Rat Race
Unfortunately, despite having a general sense of purpose in their work, many lack a real sense of progress.  While they can smell and nearly taste the cheese that they're after, and can envision what the exit to the rat race will look like when they reach it, they never seem to be able to find either.  There are even some poor rats in the maze who never reach their goals and die before they’ve ever had a chance to live.

The fact of the matter is, especially in the modern world, work and career can become a lot like a rat race maze with its own labyrinth of wrong turns, dead ends, setbacks, and pitfalls.  It can be easy to get lost or stuck behind the cubicle walls and go years without making any headway, or discovering what the next step—or the next several steps—needs to be.

Well, if that describes you and you feel stuck in the maze of your work, I want to give you 3 helpful ways you might try navigating the daily twists and turns that all seem to look alike.  And, for what it’s worth, these are all principals I’ve adopted over the years that I think have made a real difference in my situation.

#1.  Learn from the older, wiser rats.
The first principal I think would serve you as you try to find your way through the maze is to learn as much as you can from the older, wiser rats who have been in the race a lot longer than you have.  If there’s one problem that’s common to every new generation, it’s the pride they have in thinking they know more than the generation that came before them.

Folks, if you really want to avoid the wrong turns, dead ends, setbacks, and pitfalls of a maze, how better to do so that than to get advanced warning from those who’ve already discovered where they are and can tell you what turns not to take?  Or, assuming there are any secret doors, shortcuts, or fast tracks in the maze, how better to find those then with the help of those who’ve already found them.

My first piece of advice to anyone wanting to make real progress in the rat race is to humble themselves and to find a respected mentor, or a few mentors, who either by their own success or failures can teach you what you need to know.  Ideally, you want to find someone who can direct you from both angles.  You want to find someone who is willing to reveal their own mistakes on the one hand, but who can also show how they’ve succeeded on the other hand, with the proof of actual cheese in hand, and a clear path of breadcrumbs leading to the exit.

Find a mentor, and humbly and sincerely learn from them.  If it’s not a direct relationship with a boss, or a parent, or a grandparent, or a friend, or a pastor, or some other professional, find an author who has written on whatever the subject is and read everything they can about it.

The key is to receive good counsel, that’s the first thing.

#2.  Help younger, inexperienced rats.
The second principal I’d recommend you get in the habit of applying is to be about helping the younger, inexperienced rats around you navigate the maze in the same way you’re wanting to be helped yourself.  It’s the golden rule.  “Do unto others as you would have done unto you.” 

It’s not a dog-eat-dog world.  At least, it doesn’t need to be.  You should want others to succeed just as much as you want to succeed; and what better way to see them succeed then to help them succeed?

Have you made any mistakes in your career?  Have you discovered any important tips that have really helped you succeed?  Take the time to pass that knowledge down to the next generation, assuming they’re willing to learn.  Again, that’s always the challenge.  For learning to happen, someone has to be willing to teach and someone has to be willing to learn.  But, assuming you have that combination, it’s a wonderful thing to foster mentorships.

So, find someone eager to learn, and teach them.  Find someone not as far along as you are, and show them the tricks of the trade.  Show them the best ways to make the bosses happy, or the clients or customers happy.  When they mess up, encourage them with stories of how you’ve messed up a whole lot worse and what the best path is to make things right.  If they do a good job at something, let them know it so they’ll know to do it again.  On that note, if they mess up, assume first the burden is on you to do a better job teaching them.  If they do well, assume first that they succeeded in spite of your imperfections as a teacher and praise them.

The goal is to help them progress in work, though it’s worth mentioning that in helping them progress you’re also helping yourself progress as well.  How so?  Well, as any good teacher knows, in the process of teaching and in the process of preparing to teach, a teacher always learns more and solidifies what they know whenever they find ways of articulating it to others.

As a pastor especially I know I’ve discovered when you’re in the habit of giving advice to others, assuming your advice is good advice, your actually reminding yourself of things you’ve learned every time you share them and you keep yourself on the right path.  That goes a long way to helping you get to where you’re going.

#3.  Get an elevated perspective.
The third thing I’d say you’ve got to do to navigate the proverbial rat race is to get an elevated perspective as early as possible.  If you’ve ever been in a real maze before, whether that’s a corn maze in the farmer’s field or a hall of mirrors at the county fair, it always helps to get a glimpse from above, or to have a pre-charted map of where everything is.

If you can get a big-picture view of where you’re trying to get in life, you exponentially increase your chances of getting there.  If you don’t know where you’re trying to get.  If you haven’t defined for yourself what the “cheese” is, or what the “exit” looks like, the chances are pretty good you’re going to waste a lot of time going in circles and retracing your steps a few dozen times.

Imagine if you could pause for a moment and find something to climb onto to poke your head above the maze wall to see where you are.  Or, imagine finding a piece of paper on the floor with the following direction:  “Go straight for 20 steps—then turn left—then right—then right again—then straight—then left—and so forth.”  No doubt, that would completely change the game.

Well, you’ve got to do the same thing in life.  You’ve got to pause.  You’ve got to orient yourself and figure out where you are and where you want to get.  If you really want to help yourself, get a pen and paper and start scribbling it all down.  Write down your goals.  Write down what steps need to happen to get there.  Write down what obstacles are in the way preventing you from getting there.  Write down if you see any realistic path to get around those obstacles.  And then, take it one step at a time.

If you’re still not sure where you trying to get, may I suggest you first figure out where God wants you to get, and for those answers the Bible is a great place to look.  What does God want you to accomplish with your life.  Have you ever thought about that?  What relationships, what projects, what life’s work were you created to give your life to?  If you can figure that out, and the steps you should be taking to accomplish that, you’re already half of the way there.

Conclusion:
Hopefully something I’ve said here is helpful.  If you feel lost in the trenches of our work, and it just seems like your going in circles with every passing week, month, and year that goes by, remember what I’ve said: Find someone who can point you in the right direction.  Take the time to point others in the right direction as best as you understand it.  And get a glimpse, as early as possible, of the big picture purpose and goals for your life.  All those things, in my opinion, will help you navigate the rat race.

Shopping cart0
There are no products in the cart!
Continue shopping
0