Lemon-filled Olive Oil Lanterns
After a recent conversation with Tim regarding our winter preparations, I started doing some research on inexpensive types of homemade candles or lamps. Last year we had a horrible snow and ice storm dumping over a foot of snow on the roads and power lines. Our property is at the end of the line, so any power outages means that we will be the last ones to have our power restored. This all boils down to us needing to be more prepared for a long power outage.
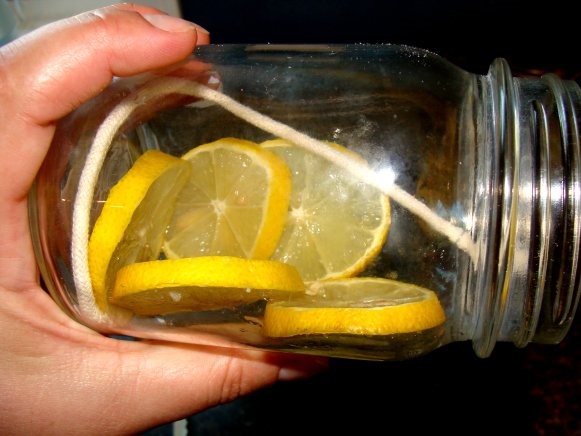
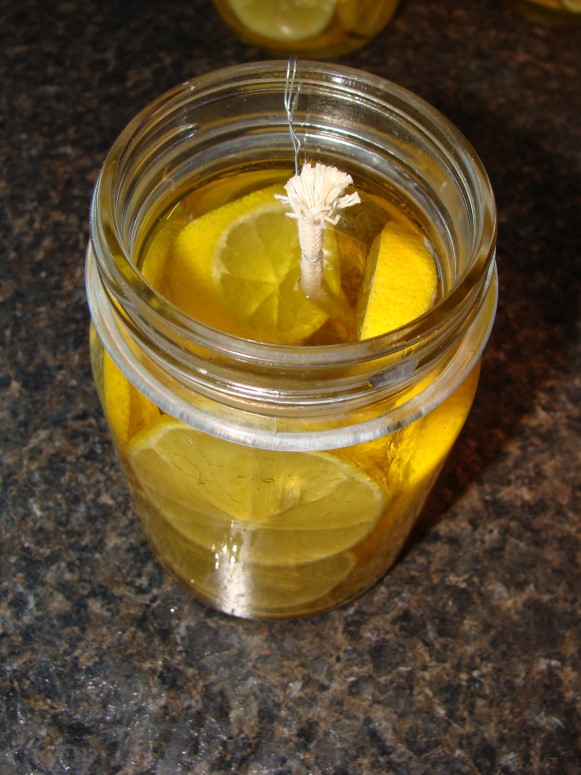
Using what I already had inside the house along with some lemons given to me at church this past Sunday, I was able to spend just a few dollars on some very economical (and pretty) oil lanterns.

The great thing about these little lamps is that they can burn smoke-free for many, many hours. If the oil starts to get low, just refill. Also, you can continue to reuse the container and just add a new wick.
[/vc_column_text][/vc_column][/vc_row]What You Will Need
- Olive or vegetable oil
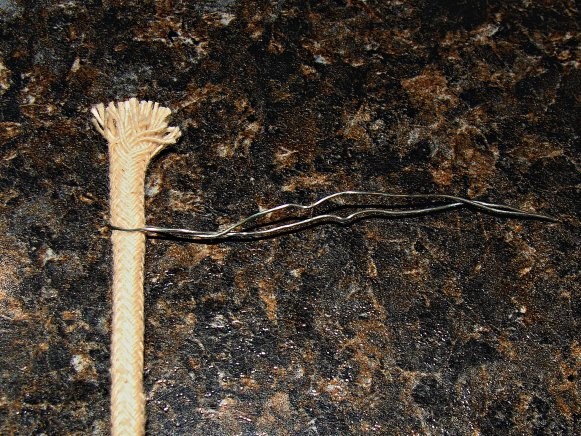
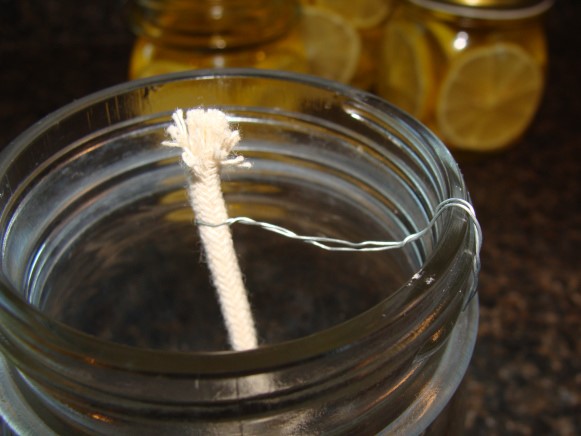
- Lantern wicks
- Floral wire (or paper clip)
- Container
- Lid (optional)
- Fruit or herb filler